
Knowledge Base > Campaign > Pages and forms > Adding personal fields
Fields
Field is a line of information stored in the system and contains information about your contacts (name, address, birthday, etc.). Implement personal fields in the campaign, allowing you to tailor your campaigns (emails, SMS) independently to each contact.
You can also set personal codes for coupons, benefits, and birthday gifts – for each of your contacts.
In order to send an email / SMS campaign with the first name of each contact, you must first ensure that a first name field is set up in your account, and then verify that the first names of your contacts are mapped under this field.
Setting up personal fields
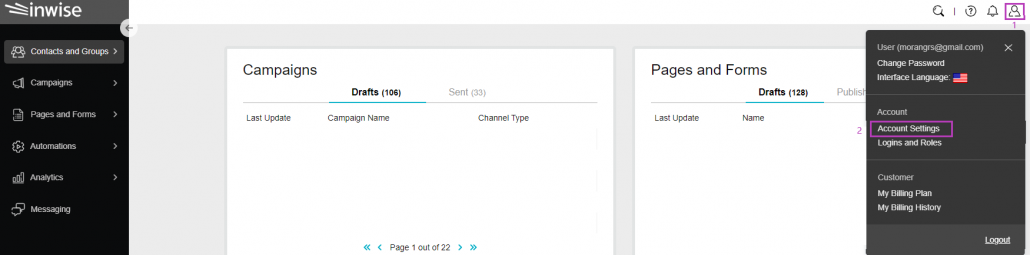
In order to add or update the personal fields, click on the “Little Man” icon at the top of the screen (1), then click on “Account Settings” (2). For more information contacts information fields guide
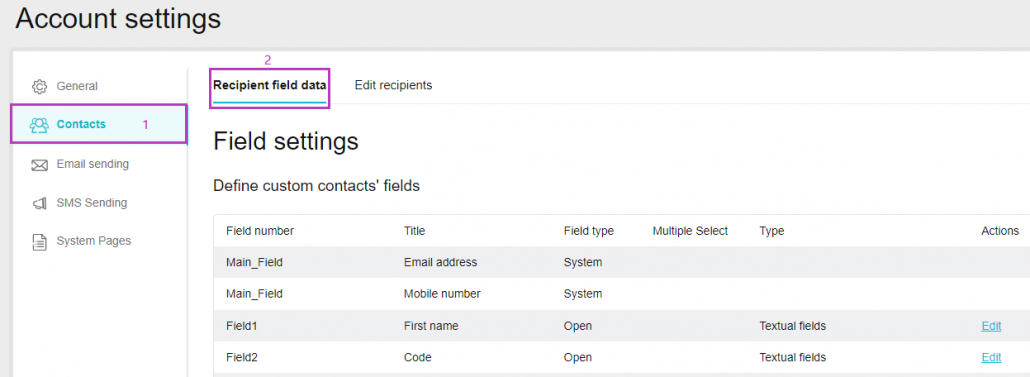
On the side bar click “Contacts” (1) and in the top menu, select “Recipient field” (2).
In the Field pane you can check your field settings, add fields, and change them.
Apart from the fields: email address and phone number, all the other fields can be edited and changed.
How to implement field in mailings?
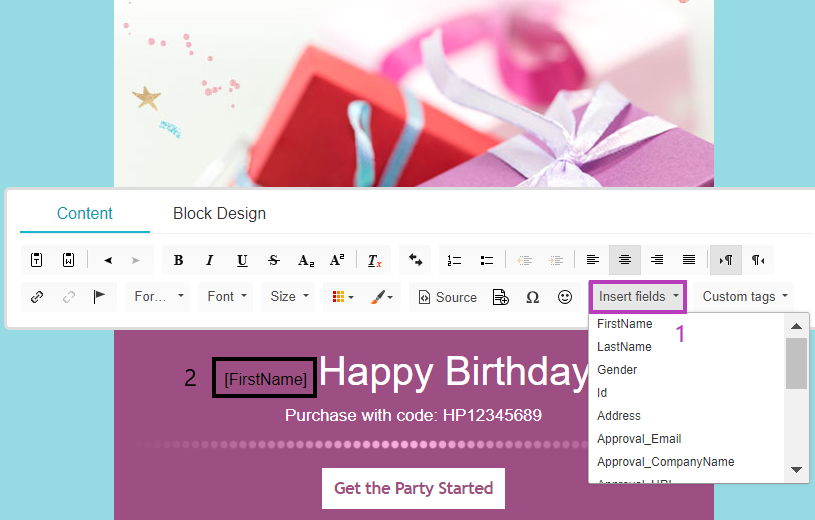
In the campaign design screen, click the location where you want to add a field. In the edit bar that appears in the “Personal Fields” menu, select the appropriate field (1).
Contact information such as first name, last name, email address, hobby and phone number are stored in the system. These fields (except for email and phone number) you can modify, and set according to your needs.
When editing the mailing, the personal field will appear as the field name in square brackets in font and auto color (2). The font and the color must be matched to your design.
After sending the email, the system will extract the transplantation data and have it converted into information in the system. So the mailing will be sent to the contact containing his first name, as it appears in the First name field in his contact details.
You can also add personal fields to the mailing by typing the word “field” followed by the relevant field number, with a “#” at the beginning and end.
For example, a first name is field number 1. Therefore, you should type: #field1#
Coupon code
To send your contacts a unique coupon code, you have to set a field in the system for that proposal – more information in this guide.
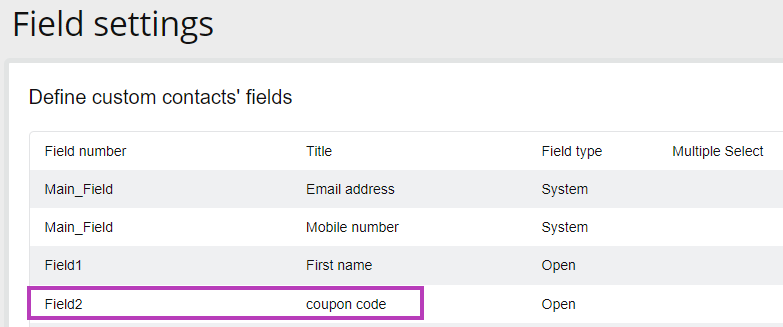
In this example, we set field 2 for the coupon code.
Now, you should set for each contact his unique coupon code. Its recommended to import Excel/CSV file.
The file should contain the columns: Email/phone number and coupon code. More information in this guide.
Finally, while editing the campaign, click the location where you want to add a field. In the edit bar that appears in the “Personal Fields” menu, select the code coupon field.