Knowledge Base > Marketing automation > Automations
The automation system can be turned on by some triggers arising from customer action, such as: Opening Email, Clicking on Email or registering to a specific mailing list.
For example: when a contact clicks on a link in the campaign, the additional campaign will be sent to him, and while clicking on another link, an SMS will be sent to him.
Create automation
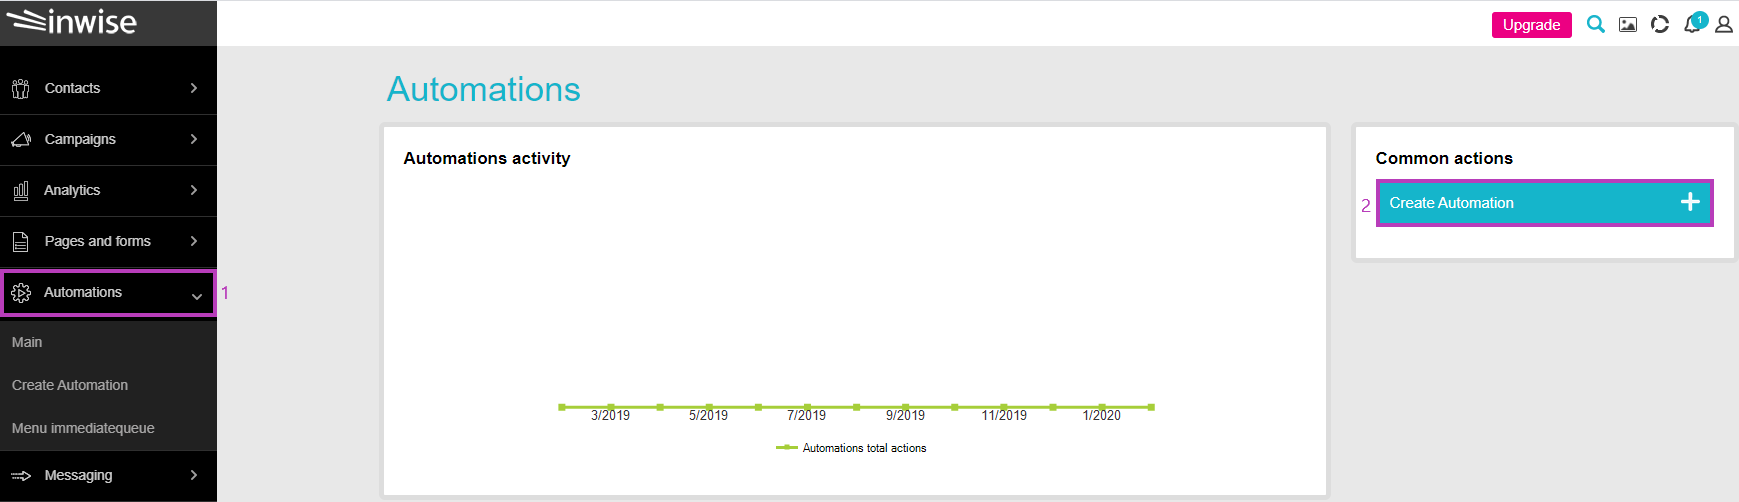
On the main login screen, in the main menu bar on the left side of the screen, click on the “Automations” tab (1).
On the right side of the screen, a window will open “Common Actions”, click on “Create Automation” (2).
Select an empty automation template.
Every automation consists of a trigger and an action.
Trigger (blue) – is the factor that activates the automation.
Action (green) – The action that will be performed after the trigger has occurred.
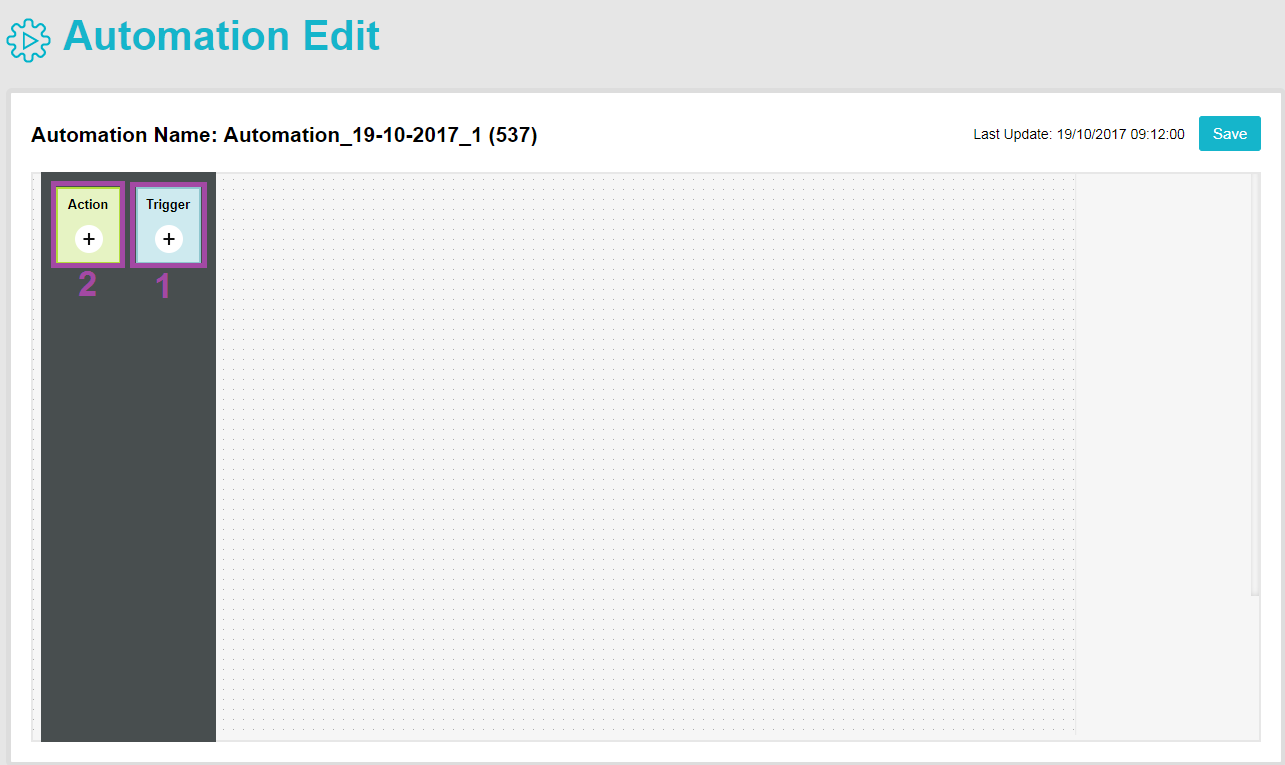
Adding a trigger (1) and action (2) sequence to the automation is performed by dragging the elements (from the left window,) to the automation editor (the dotted right window).
In order to connect them, click on the circle under the trigger (3) and drag an arrow to the action.
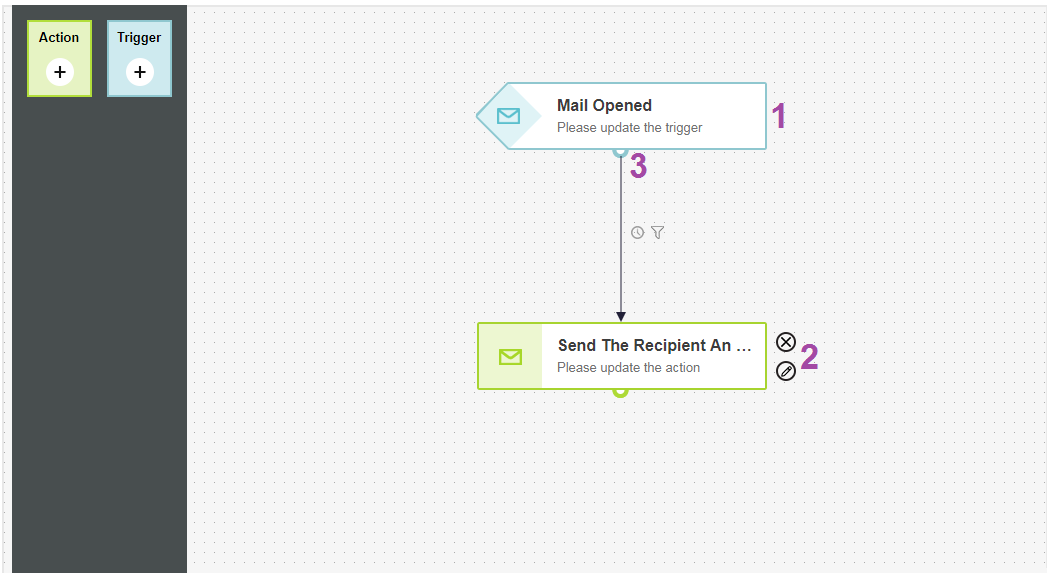
You can delete (1), or define and edit all the properties of each trigger and action by clicking on the pencil icon (2) that will open the properties editor interface.
In addition, you can filter contacts’ segmentations which the action will apply, and schedule the action.
on.

Now start editing the automation
Editing the Trigger
First, select the relevant automation template.
For example – If you want each contact who opened the email to receive another email, you should automatically select: “Contact opened an email – send him another email”.
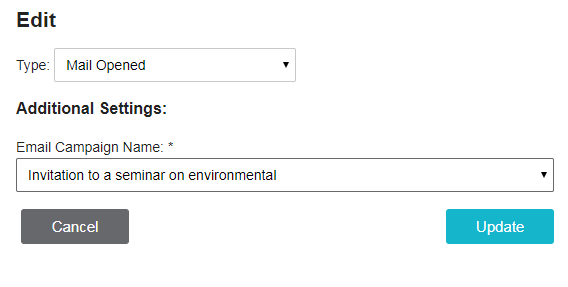
By clicking on the pencil icon (2), next to the relevant trigger, the editor will open.
Type – select a trigger from the dropdown list (opening, clicking, updating a form on a landing page, etc.…).
Additional settings – Depending on the type of trigger, select from the list the campaign/landing page/pop-up to which it refers and on which the automation will operate.
In the example, the “Open Email Contact” trigger was selected, so in additional settings you must select the email campaign, which, if the contact opens, will send him another email “Email Campaign: Invitation to a seminar on the environment”.
Finally, click “Update”
Editing the action
Once you have defined the trigger – the scenario, you will define what action you want to take place.
For example, sending a reminder email (to anyone who opened the invitation email for a seminar)
Click on the pencil icon, next to the relevant action, to open the editor.
Type – select the action from the list offered by the system (sending, registering, removing, updating, marking, importing, etc.…).
Additional settings – Depending on the type of action, select from the list the campaign/landing page/pop-up you want to run.
In the example, in the type of action, select “Send to the contact email” and in additional settings, select the reminder email to send.
Finally, click “Update”
Editing the Filter
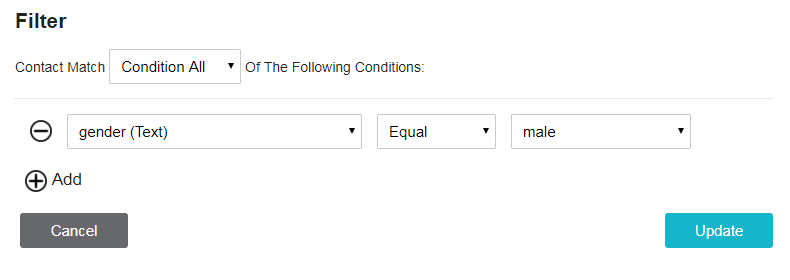
You can edit each automation and determine the segmentation of the contacts to which the automation will apply. You can create several segments. In order to create and edit a segmentation click on the funnel icon (3). This click will open a segmentation editing interface.
You can choose whether to set a filter on each of the conditions or only on one of them. You can add a number of conditions by clicking “Add”.
In the example, the automation was defined to only take place if the contact who performed the operation is of the male gender. Creating Automation – Settings
important points:
- Filtering occurs after triggering. For example, if the trigger was an update of contact information (update of residential address from the southern area to the northern area), the filter will take into account the new value, in this case – residential address “equal” to the northern area.
- Each campaign (email and/or SMS) will be sent only once to each contact. These cases can be seen as “skipped” in the analytics area of automation. For example, if you have set up an automation that fills out a signup form for the conference, a confirmation email about the registration will be sent to the contact person. If the contact has filled out the form twice, it will send him a confirmation of registration only once. In Analytics this will appear once as “successfully executed” and the second time as “skipped”.
- If an update is made to one of the contact’s fields after the operation has been performed and the automation has been activated, the automation will not be updated accordingly.
For example: Consider an automation where a contact who filled out a form is sent an SMS message after 3 days. If during these three days the contact has updated his phone number, the automation will not be updated accordingly, so the SMS message will be sent to the first phone number in the system.
Pause Editing
Clicking on the clock icon (4) will open the timing interface. You can select the delay time until the operation is performed. You can select minutes / hours / days / weeks, and then add a number in the corresponding field for selection.
For example, if you want to send another email after three days from the date of opening the email, you will update with a delay: 3 days.

* Delayed operation will be displayed in the automation analytics as “entering the queue” until it is performed.
Create complexing automation
You can create an automation that includes two or more operations and even combines different tools: SMS, email. You can add another action to the basic automation by dragging “Action” on the Edit Automation screen.
By clicking on the pencil icon, you can select from the list the purpose of the automation – the type of action from the drop-down list.
In the example, “Send to SMS contact”, then in “Additional settings” select the name of the SMS campaign from the list of campaigns in the system.

Automation activation
When you are finished editing the automation click on “Next” in the lower right side.
In the next page (Automation activate page) you can change the automation name and add a description for internal purposes only.

To activate the automation, click on “Publish” on the page’s right side. You’ll get an immediate message that the automation was published.
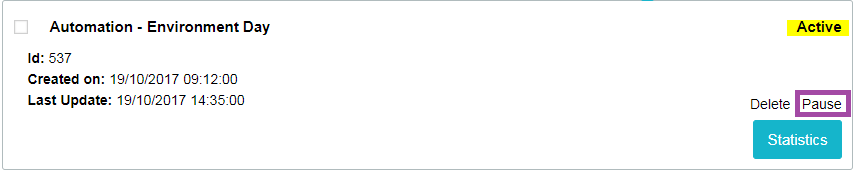
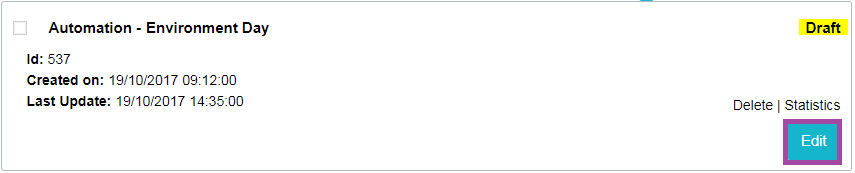
In case that you want to edit or stop the automation after the activation, in the left menu bar, click on the “Automations” tab. The list of automations will open. In the pane of the relevant automation click on the “Pause” button.
The status of the automation will change from “Active” to “Draft”. In draft mode you can delete the automation, edit it or restart it.