
Knowledge Base > Account Settings > Domains Authentication
The domain managing helps you to improve the deliverability and increase significantly the possibility that campaigns you send will reach their destination to the inbox of your recipients and not to Spam box.
To help ensure your campaigns reach your recipients’ inboxes and to make your campaigns look more professional, you can set up custom DKIM authentication for your domain, and add inwise to your SPF record. We recommend to authenticate your own domain and Email address.
To authenticate your domain in the account settings, follow these steps:
1. Domain authentication.
2. Configure the SPF
3. Configure DKIM records
4. Update the “sender address”
* You can contact your system administrator to configure the SPF and/or DKIM records in the DNS settings of your domain.
Step 1: Domain authentication
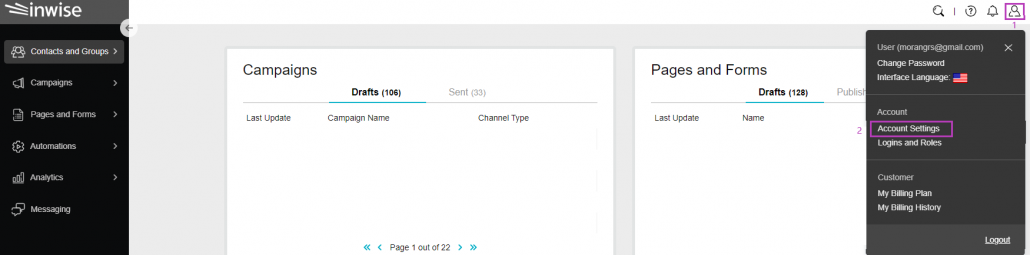
Click on the “Little Man” icon at the top of the screen (1), then click on “Account Settings” (2).
On the sidebar click “Email Sending” (1) and in the top menu, select “Domain Authentication” (2).
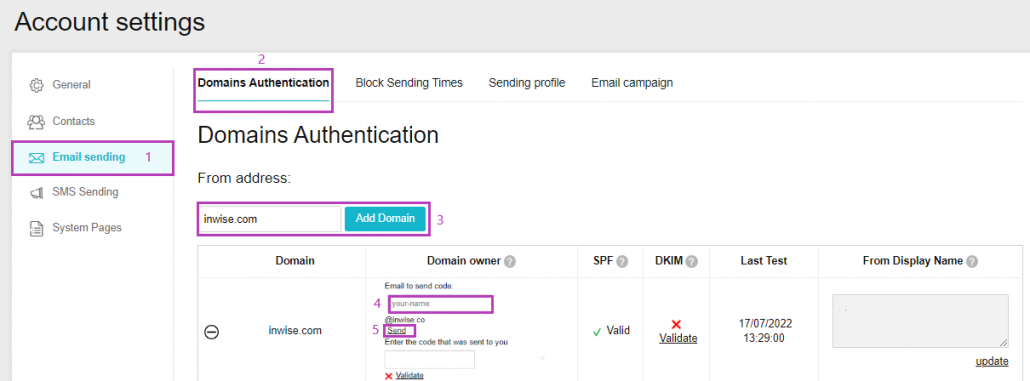
Domain authentication steps:
- Type your domain name in the sender address box, and click on add domain.
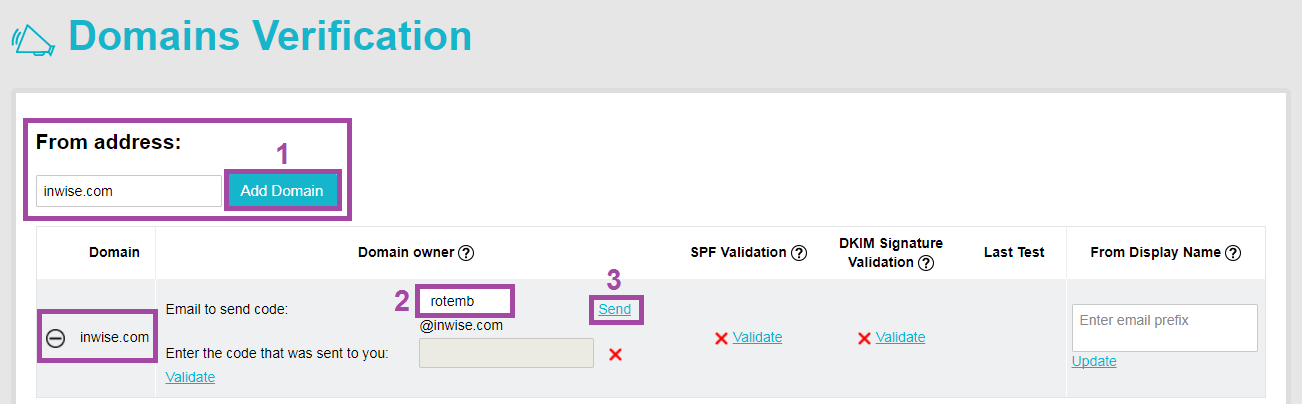
- In this step, we ask to type Email address to authenticate the domain ownership.
This will send a verification code, which you need to copy & paste it in the text box area and validate the code.
Step 2: SPF record authenticate:
SPF record is a special TXT standard record that indicates the host’s names, which allowed to send mail in other domain names.
The record defines the link between the sender email address and inwise sending servers.
This standard prevents fake sender addresses in email messages and increases the campaigns sending deliverability.
How to set SPF record?
SPF setting performs on your domain DNS servers. Add TXT record that specifies the domain details and email servers which allowed to send an email for the domain.
SPF record to setup: v=spf1 include:spf.inwise.com-all
After setting, you should validate the record as we can see in the picture:

How to update SPF setting
In case there isn’t TXT records with the characters v=spf in the DNS settings:
In the field “Host/Name” enter: @
In the “Content/TXT Value/Data” field enter:
v=spf1 include:spf.inwise.com-all
If there is TXT record:
Edit the record and add only the highlighted values as follows (You shouldn’t add a new record):
v=spf1 ip4:…………. include:spf.inwise.com-all
Step 3: DKIM record authenticate:
Domain Keys Identified Mail (DKIM) is a standard that allowed senders to sign their email messages, and the internet suppliers use these signatures to make sure that the email is legal and didn’t change in the sending process.
How to add DKIM record in your DNS server:
You should add a record into your DNS with these parameters:
Record name: idk._domainkey.yourdomain.com
Class: IN
Type: TXT
Record text: v=DKIM1; k=rsa;
p=MIGfMA0GCSqGSIb3DQEBAQUAA4GNADCBiQKBgQC793APYZnw5lV8aZ1U9pAXaLP39V4JY6O6ehfkQBf4WvNsGHB/vBVfSW9xTikPYCJW3GPzqsr49FPXFiBvDFk4xJlw9ZEgNCwkiXOT1xiMSkorAH9tQvt8amo9/+jl9isGDTgzrC0fWr1UseFrUJpyuI497pBKYqxVjl+vn6yFuwIDAQAB
* The “Value” should be in one line without Enter/New line
How to test that the DKIM record was added correctly:
You can choose online DKIM validator tools such as Mxtoolbox or mail-tester.com with these parameters:
Domain name: yourdomain.com
DKIM Selector: idk
How to update DKIM record
Add a new TXT record.
In the field “Host/Name” enter the value: idk._domainkey.yourdomain.com
In the field “Content/TXT Value/Data enter the value:
v=DKIM1; k=rsa; p=MIGfMA0GCSqGSIb3DQEBAQUAA4GNADCBiQKBgQC793APYZnw5lV8aZ1U9pAXaLP39V4JY6O6ehfkQBf4WvNsGHB/vBVfSW9xTikPYCJW3GPzqsr49FPXFiBvDFk4xJlw9ZEgNCwkiXOT1xiMSkorAH9tQvt8amo9/+jl9isGDTgzrC0fWr1UseFrUJpyuI497pBKYqxVjl+vn6yFuwIDAQAB
How to validate that the DKIM record was added correctly in inwise:
After the setting has finished you need to validate the record.

Step 4: Update sender’s email address
After performing all these steps successfully ((a green checkmark (valid)), you can now update the sender’s email address, or numbers of addresses, separated by a comma.
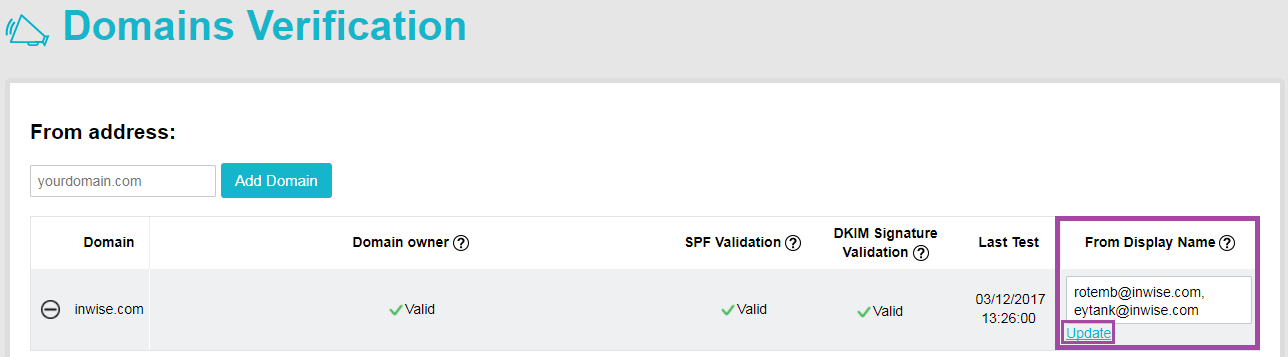
Now we can choose different sender email addresses in each send profile or choose an address from selection list on creating a new campaign.