
Knowledge Base > Campaign > Blocking sending on certain dates
There are two ways to set up the sending profile:
- Update default settings for all campaigns.
- Update different settings for different campaigns.
1. Update default settings for all campaigns.
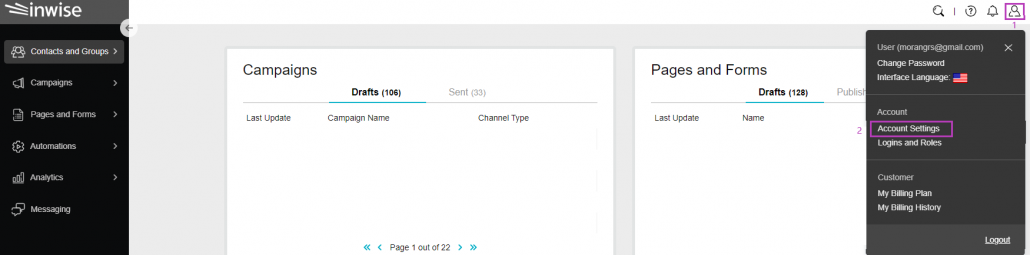
Click on the “Little Man” icon at the top of the screen (1), then click on “Account Settings” (2).
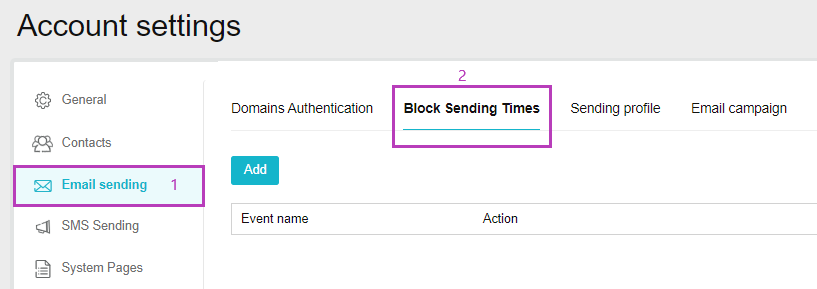
On the sidebar click “Email Sending” (1) and in the top menu, select “Block sending times”:
2. Update different settings for different campaigns.
First, a new campaign must be created. For this purpose, you can use the guide for creating and designing an email campaign or the guide for creating an SMS campaign.
At the end of the campaign creation process, in the last screen “Scheduling and confirming the submission of the campaign”, you can set the limits for submitting the campaign.
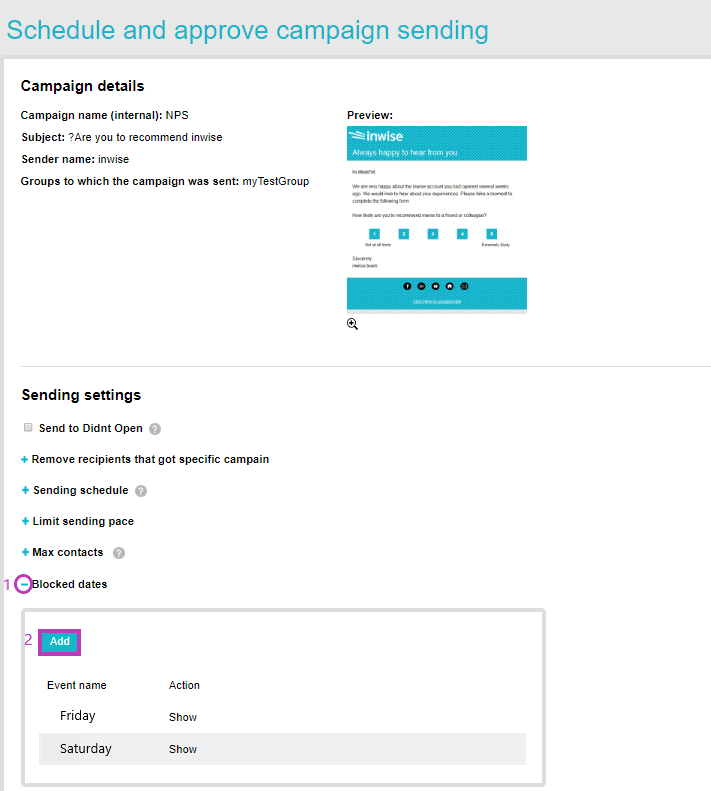
Click “Blocked dates” (1). A window will open in which you can see that the system’s default is to send on Fridays and Saturdays.
To add additional restrictions, click “Add” (2).
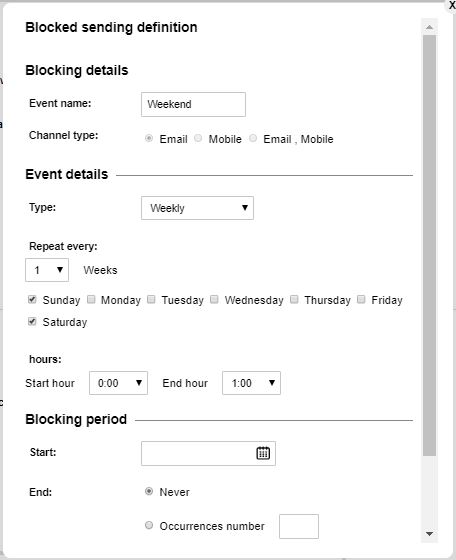
A pane will open: “Blocked sending definition”.
Blocking details:
Event name – Choose a name for internal purposes which will be visible to your eyes only.
Channel type – You can choose to restrict sending only to some or all mailing channels: email, mobile devices or both.
Event details:
Type – In order for the restriction to be for a one-time event – select: “One time”.
In order for the delivery to be limited for a cyclical event, you must choose: daily / weekly / monthly or yearly.
This way you can set one submission limit to several days (e.g. the campaign will not be sent every three days), weeks (e.g. the campaign will not be sent on Monday every week), months (e.g. the campaign will not be sent on the 14th of every month) or years (e.g. the campaign will not be sent on New Year’s Eve every year).
Hours – Select the start and end hours of the block.
Blocking period:
The start and end dates of the block must be entered. If the end time of the block is unknown – choose “never”.
For a certain number of repetitions (e.g. 3 times), write the number 3 in the number of shows.
Examples of blocking settings:
Creating a weekly event – In order to create a date when no weekly mail will be sent, choose the event type “weekly” in the event details..
In the “Repeat every” field, enter the number of repetitions that this block will make. (e.g. one week / two weeks / three weeks, etc.)
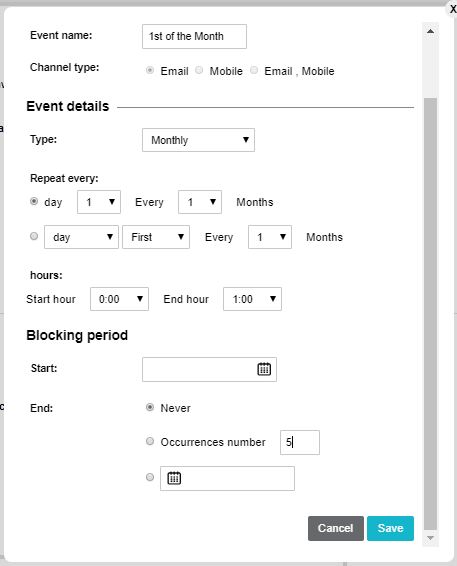
Creating a monthly event – In order to create a date each month when no mailings would be sent, choose the event type “monthly” in the event details.
In the “Repeat every” field, select the number of repetitions that this block will make. (e.g. every few days, every month / a few months or a certain day every month / or few months.).
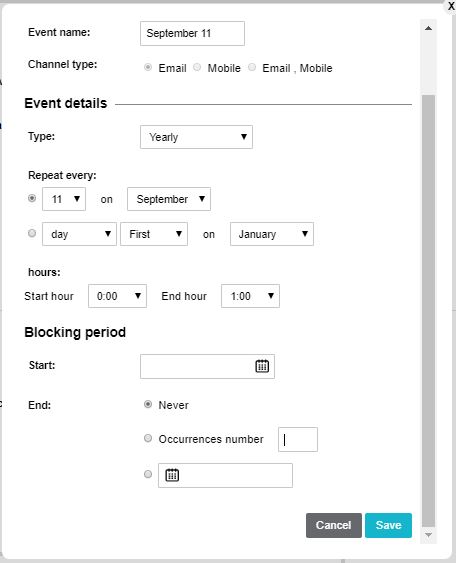
Creating an annual event – In order to create a date when no mailings would be sent annually, choose the event type ”annual”.
In the “Repeat every” field, select the number of repetitions that this block will take. (e.g. every year on a certain date or at a certain time in the month.)
Finally, in order to save the event, click on “Save” which is at the bottom of the window.
You can now see the event on the “Send Blocking Times” page. It can be edited and even deleted if necessary.