Knowledge Base > Contacts > Import Contacts to a group
Once your contacts are imported, you can create groups and send them mailings and SMS messages, and even create different segmentations.
Importing new contacts into the system can be performed in three ways:
- Import CSV files – this method is suitable for large and well-organized contacts. Use this method when importing multiple details of contacts or a large database.
- Copy/paste from Excel – this method is suitable for fast import without uploading files into the system. By using this method you can import up to several dozen contacts.
- Add Email addresses (up to 1,000 addresses).
This guide contains 4 sections:
- Before importing – important points
- Step 1 -Data importing copy/paste from Excel or CSV file importing
- Step 2 – Choosing the group
- Step 3 – Mapping the importing fields
1. Before importing – important points:
- Size: the recommended size of the Excel table is up to 10,000 records. The maximum allowed size of the CSV file that can be imported is up to 10MB
- Dates: any standard format of date is allowed. For example 27/04/2014 or 27.04.2014; or 27-04-2014. It’s very important to be consistent throughout the file format of your table. This can be modified later on, after importing into the system.
- Phone numbers: It is important to be consistent so all the mobile phone numbers will have the same format. You can use one of the following formats:
972528392609
972-528392604
052-8392606
0528392606
528392604
Pay attention:
- Before importing a CSV file, you should create a new file and not use one that’s already in use.
- Titles: Each column must have a title. Do not use special characters such as (brackets), “quotes”, and so on.
- Content: All the cells below the titles must contain content
- Email addresses: The file must contain a column of email addresses ( the location of the column does not matter).
- When importing a file slowly, the system checks 2 key fields: email and phone. If there is a conflict between one of the fields in the file and the contact information that exists in the system (regardless of the group), that contact’s information will not be imported.
Step 1 –Data importing
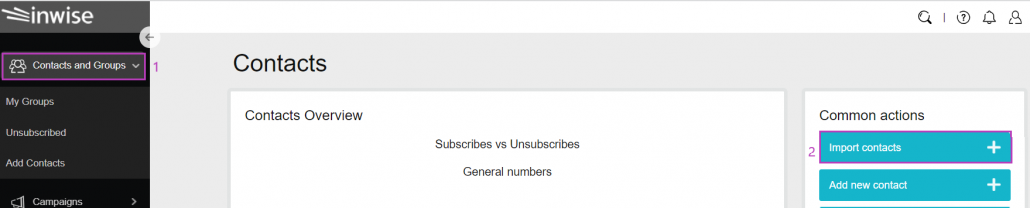
On the main login screen, click on the “Contacts and group” tab in the main menu bar on the left (1). Next, on the “Common Actions” menu, click the “import contacts” button (2).
Once you are on the “Import contacts” page, select your method to upload the contacts to your account.

- Import Email addresses separated by comma
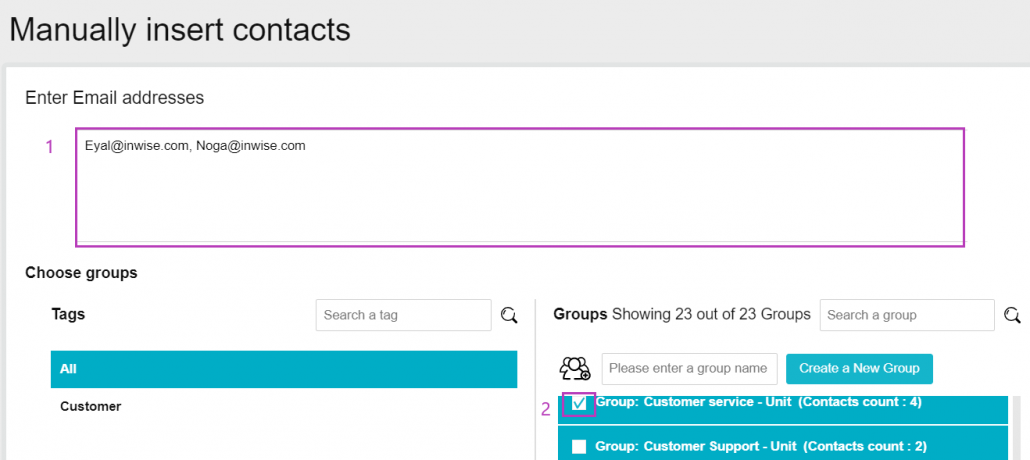
After selecting the “Add email addresses only” method (1), a window will open in the system, where you can enter the email addresses (1) and choose to which group to add them (2).
Finally, click “Save”.
- Copy/Paste from Excel file
After selecting the “Copy/Paste from Excel file” method, a window will open in the system, where you can paste your data

Now you can go to your Excel table and copy the data. In the Excel table, you can select the data by dragging the mouse across the table. Another option for selecting is to click on CTRL+A – this combination will choose all the data in the table.
*There is no need to erase the empty columns. After pasting the information in the system, the system will know to keep only the columns with data.
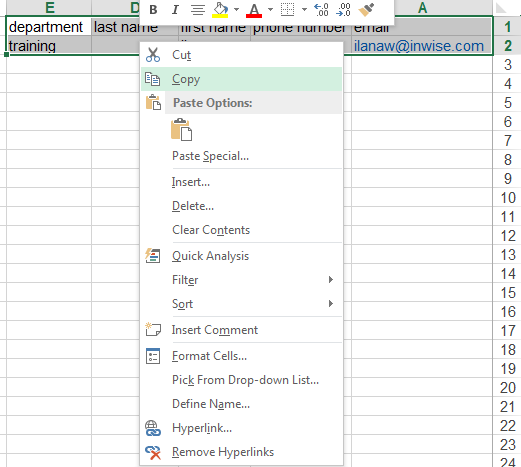
Once you have chosen the data, you can copy it into the system. That can be done by clicking on the right button of your mouse and by choosing “copy” or by using CTRL+C keys.
Back to the system – now you can paste the data in the “importing contacts to the group” window which you opened earlier in the system. That can be done by clicking on the right button with your mouse in the window and choosing “paste”, or using CTRL+V keys.
Now you can scroll the screen down and continue to step 2 – choosing the group to which you want to import the contacts to.
3. CSV file importing
If you have a lot of contacts that are in a large and well-organized Excel file, you can import them into the system by using the CSV file import option.
CSV is a file built from tables, just like a regular Excel file but saved in a different format. This type of file can be exported from most types of databases, such as CRM software or Excel software. The system detects CSV files and maps the data that appears in this file.
How to save the file?
In your Excel sheet, click “File”:
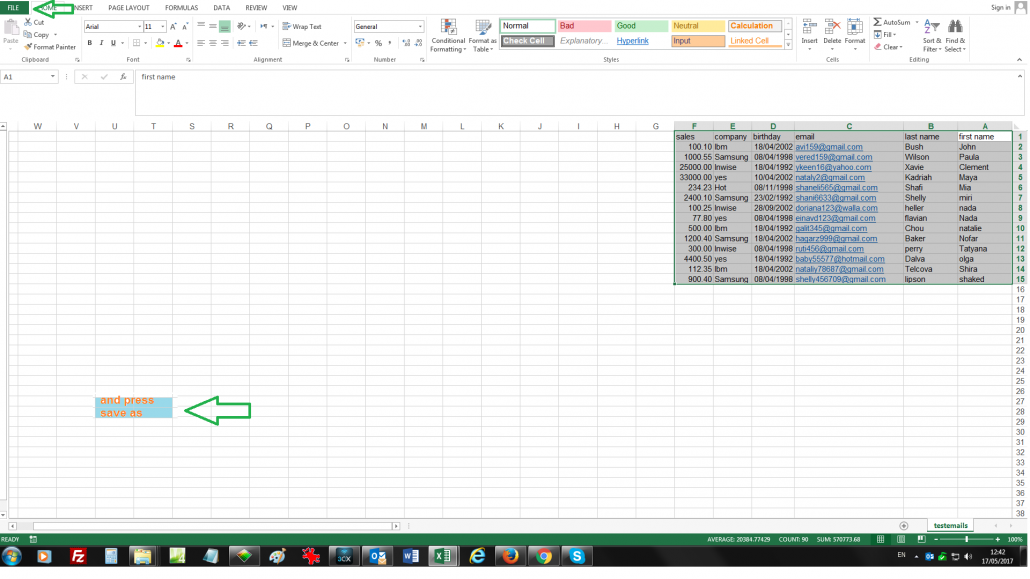
And then click “Save as”
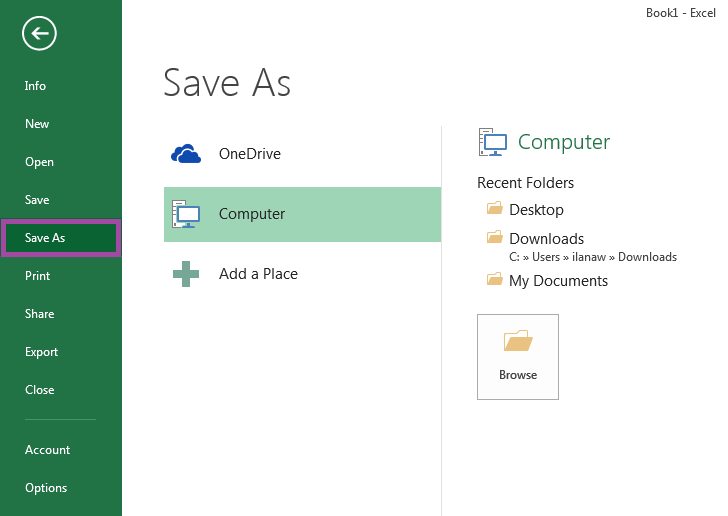
Now you can choose where you want to save your file on your computer (for example, Desktop).
Then a window where you can type in the file’s name will “pop up”
In the same window, in the “Type save as” field you can choose the CSV format. It can be done by choosing the “CSV (Comma delimited)” format file as shown in the following picture.

Once you have saved the file, you can start the importing process.
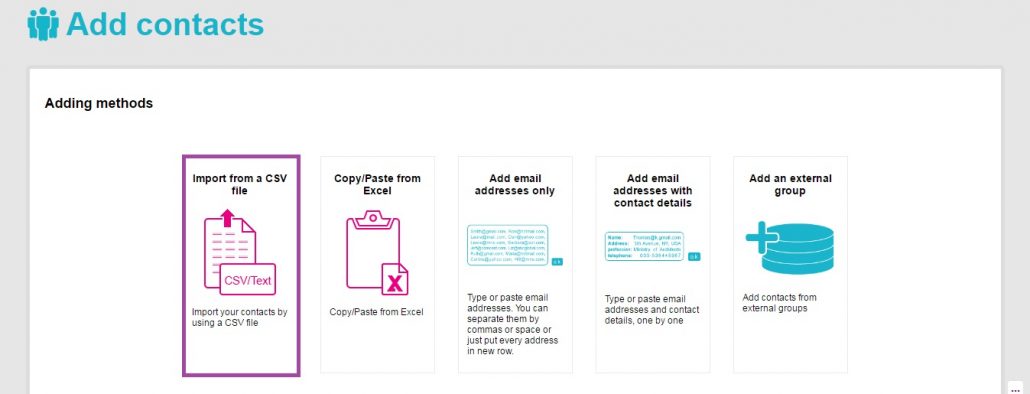
Click on the “Add contacts” tab in the main menu bar on the left > “Add new contacts” > and on the “Adding method” page, choose “Import from a CSV file”
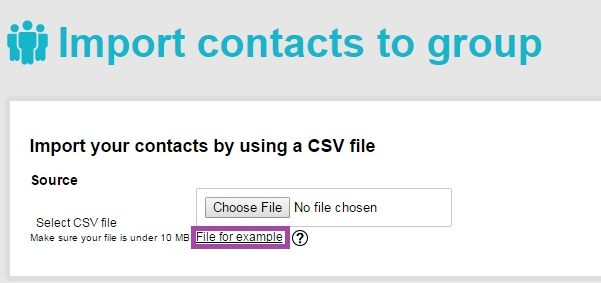
By clicking on the link “File for example” you can see an example of the proper CSV file
Now you can choose the file that you want to import from your computer.
Clicking on “Choose file” opens a window where you can choose the file you want to import.
Selecting a CSV file from your computer
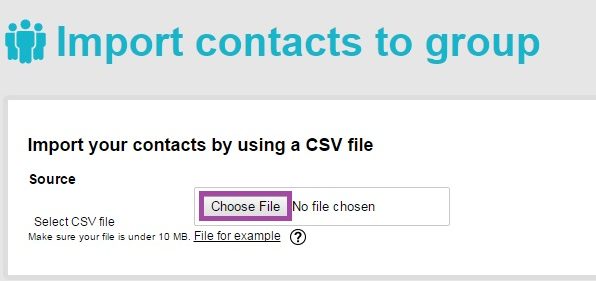
After choosing, the name of the file will appear in the pane
Now you can scroll the screen down and continue to step 2 – choosing the group which you want to import your contacts to.
Step 2- choosing the group
After you have pasted the contacts’ details or imported the CSV file, you can choose the group to which you want to import the contacts.
You can choose a group that already exists in the account (2), or create a new group (1).
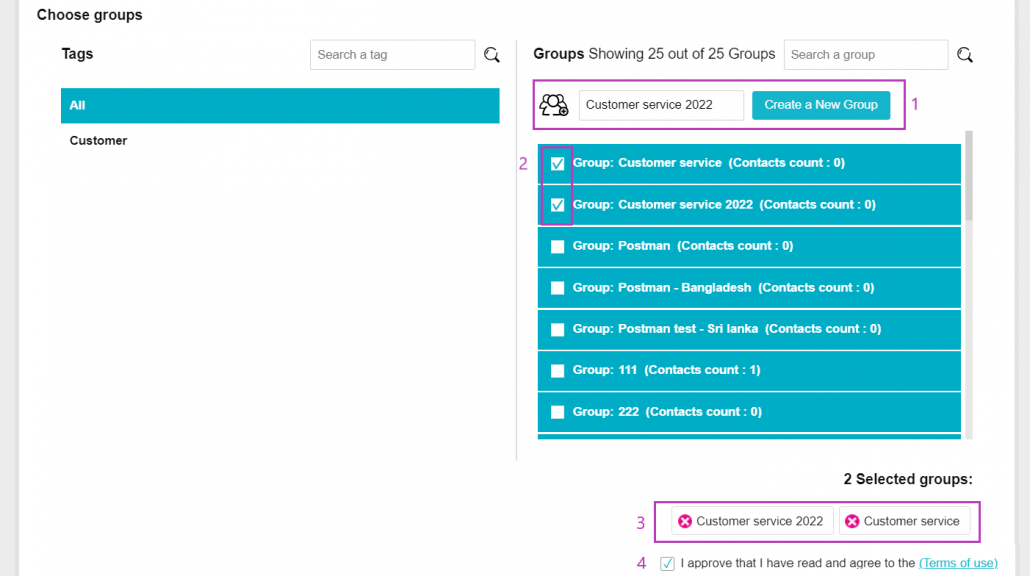
A new group will show up automatically after creation.
You can search for a group to add the contacts to, using the search bar: “Search a group.” You can type the name of the group or part of its name, and the system will find it automatically.
After choosing the group (3), you can click on ”Continue” and go to the next step – mapping import fields.
Step 3 –Import fields mapping
The phase of mapping import fields allows the system to recognize the data that has been imported, and to link it automatically to the right fields in the system.
For example, a column that contains email addresses will be mapped automatically to the email field, which exists on every account.
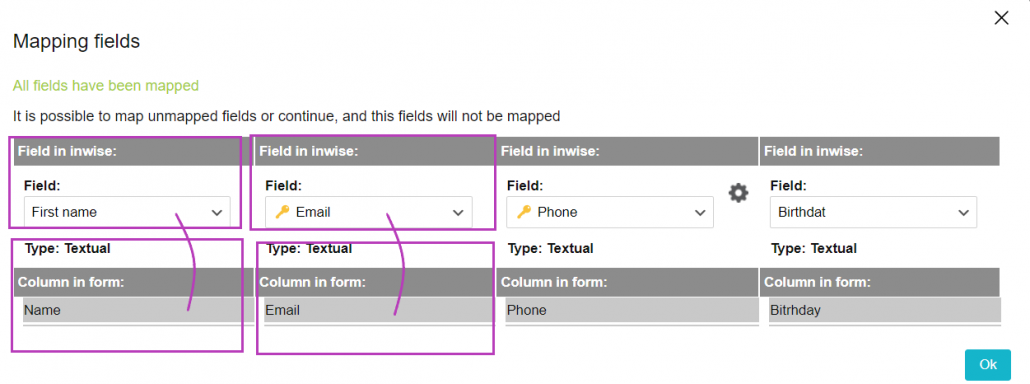
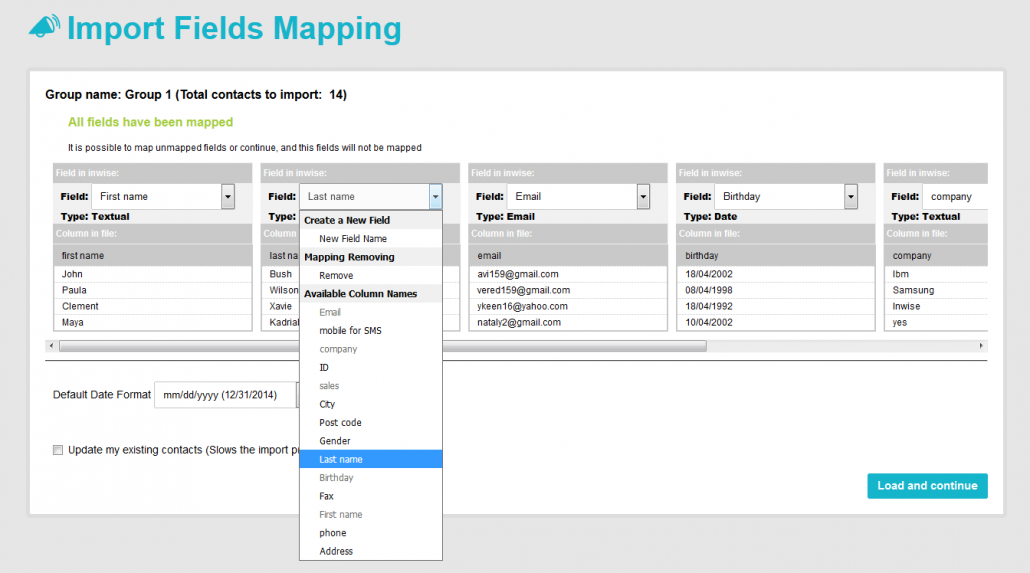
In case there are fields that the system will not be able to map automatically, or if you want to choose your own fields to map the data; you can manually set the field name for each column to be mapped.
How?
As stated previously, you can choose a field that already exists in the system or create a new field. However, you can also leave a field unmapped**. Get more information in this guide.
**Note: the system will not import data from the unmapped field.
The “email” and the “phone number for sending messages” fields are key fields. Hence, one of these two fields must be mapped. The system will not let you continue to the next step unless one of these two fields is mapped.
Choosing the option ”Update existing contacts” (which does slow down the importing process), will update the details of the contacts which already exist in the account. The system will recognize the existing contacts and update the data that you have already entered and will add additional data which you have included in the new file. In most cases, you should choose the “update the existing contacts” option.
You can decide not to choose this option under two circumstances:
- When importing email addresses only, without additional mapping
- When importing existing contacts to a different group.
Once you have finished mapping, clicking the “Load and Continue” button will begin the process of data importing. If there are fields that could not be mapped, the system would send a message.
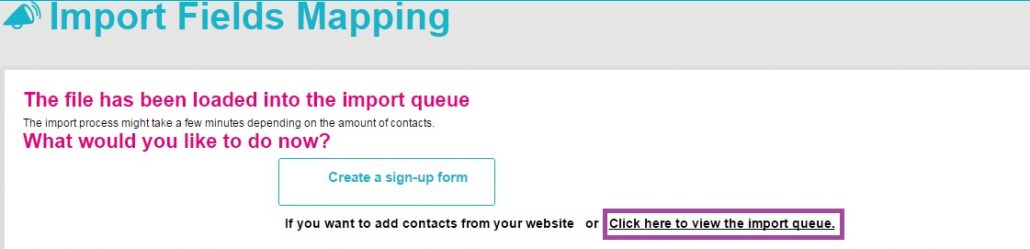
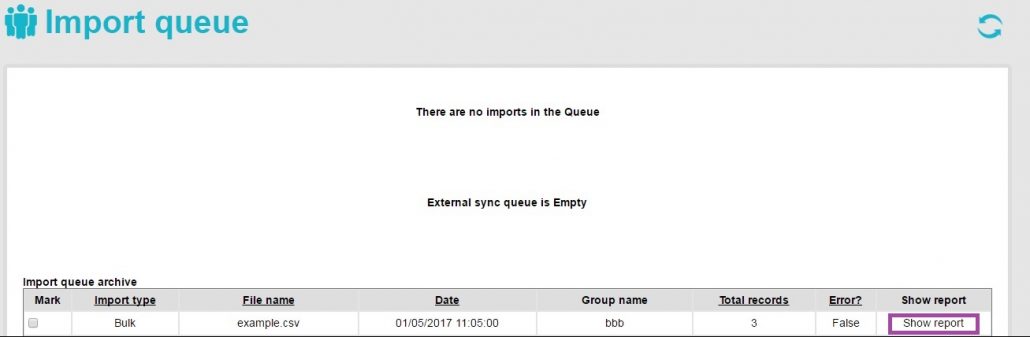
To ensure that the import was carried out correctly, the process can be viewed as an import or the import archive, which provides a detailed report on the process, can be checked.