
Knowledge Base > Campaign > AB Testing campaign
With inwise you can test up to 8 different versions of a mailing campaign, and check on a sample which of the versions is more effective, before sending the mailing to the entire mailing list.
Steps to creating AB campaign:
Step 1 – Choose the criteria for the exam.
Step 2 – Split rate
Step 3 – Determine The Winner Version
Step 4 – Edit AB Campaign
Step 5 – Results examination
1. Choose the criteria for the exam.
You have two options at your disposal when creating an AB campaign with inwise:
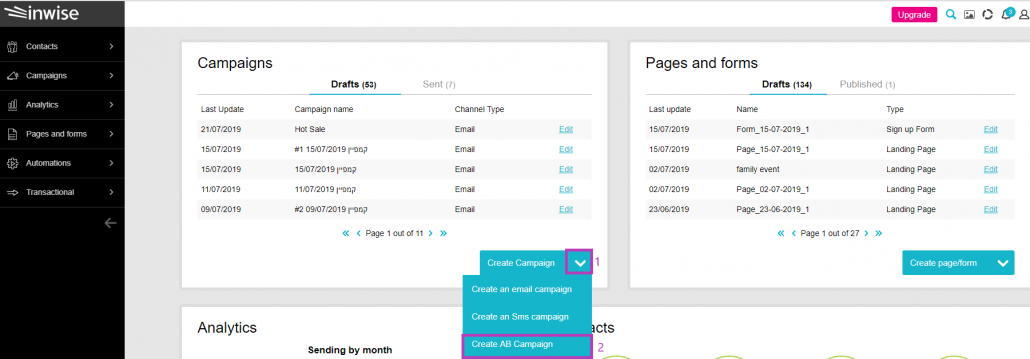
Option 1 – On the main login screen, click on the “Campaigns” tab in the main menu bar on the left (1). Next, on the “Common Actions” menu, click the “Create AB campaign” button (2).
You can also select “Create AB campaign” directly from the main menu bar.

Option 2 – Under the “Campaigns” pane on the main login screen, click on the arrow next to “Create Campaign.” Then, click “Create an email campaign” on the menu that opens (2).
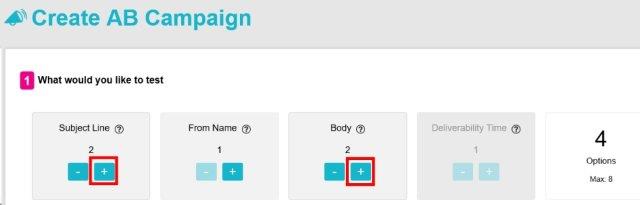
What would you like to test? on the create AB campaign screen, choose the criteria for the exam.
In the following example we test 2 subject lines and 2 bodies (contents).
This combination will open 4 different versions for the campaign: 2 content versions will be sent under 2 different subject lines.
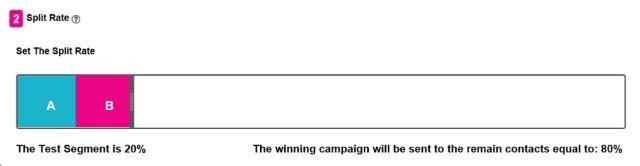
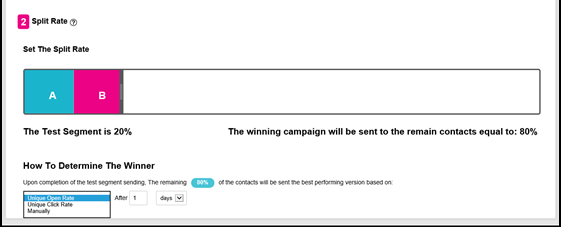
2. Split rate
After choosing the test criteria, we’ll define the Test Segment under Split Rate.
The test segment is a selection from your contact group that will receive the campaign (AB campaign will be sent only to one group of contacts). You can define the test segment yourself.
In the example, we set a 20% test segment, meaning that only 20 % of the contact group will get one version out of four versions of the campaign.
After sending the campaign to your test group (the 20%), the winning version will be sent to the remaining 80% of your contacts.
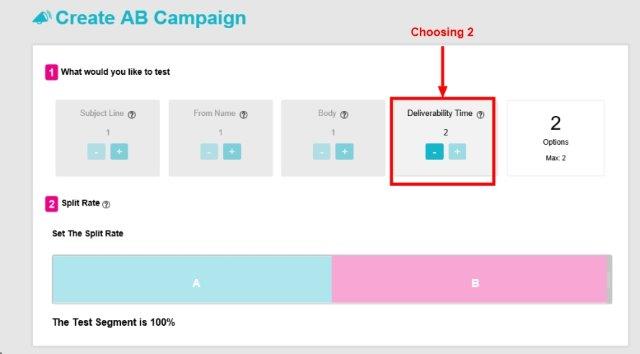
3. Deliverability Time Test
Another option for testing is sending the campaign at 2 different times, so you can test the optimal day and time to send your future campaigns.
With this option, the system will send the campaign to 50% of your contacts at one time, and to the remaining 50% at another time.
This option does not allow you to choose other criteria, nor to set a test segment (size of the test group).
The results obtained can be used to determine the optimal submission time for subsequent campaigns
4. Determine The Winner Version
At the bottom of the screen, you can set the winning version by the index:
Unique open rate – The system will refine the results itself and determine which version won, according to the highest opening percentage.
Unique click rate – The system will refine the results itself and determine which version won, according to the highest click-through rate.
In both cases the winning version will automatically be sent to the other selected contacts (in our example, to the remaining 80% of the contacts).
Manual – In manual selection the determination of the winner is done by the user and at his discretion. The system will not send the campaign to the other contacts automatically.
After defining how the winner version is chosen, the duration of the experiment should be set, that means, after how many days or hours from the moment the campaign is sent the winning version will be selected.
Click next at the bottom right corner of the screen.
4. Edit AB Campaign
After setting the criteria, you can start to edit the campaign:
Fill the subject lines you want to test.
In the Campaign name (internal), fill the Campaign name that will appear in the system. This is for internal use only.
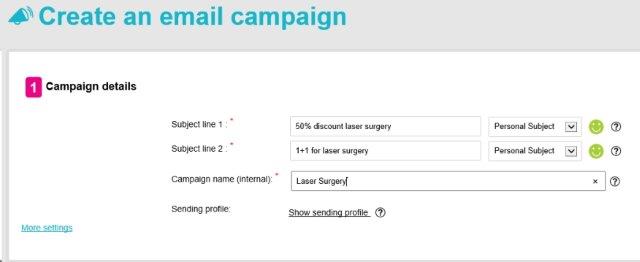
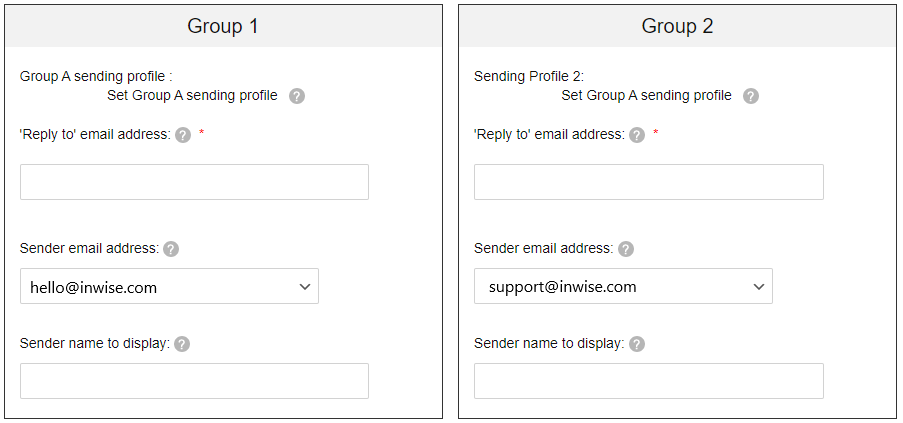
If you choose to test the “From name” set the sending profile for each test group.
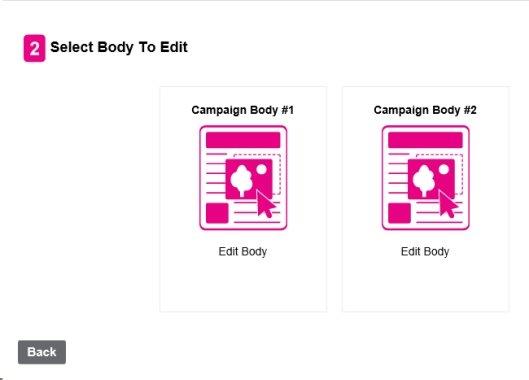
Click next and you’ll get to the Campaign body.
Click on Campaign Body #1 and edit the first campaign. After you’re done click Next, you’ll return to the Campaign Body editor and you can choose Campaign Body #2.
After you are done, you’ll have to continue the sending process, the same as for a regular Campaign.
5. Results examination
Click on the “Campaigns” tab in the main menu bar on the left (1). Click on the “analytics” button in the relevant campaign from the list.
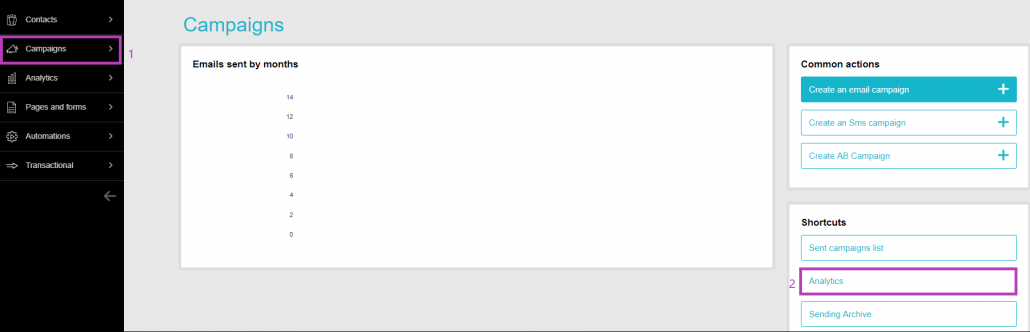

You can see the campaign statistics which were sent to the contacts.
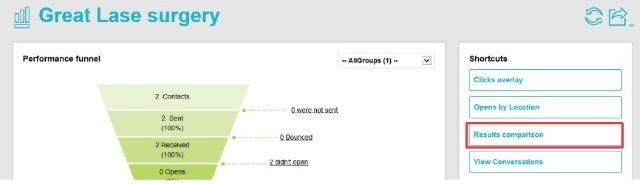
In order to see all statistics of each campaign click “Results comparison”.
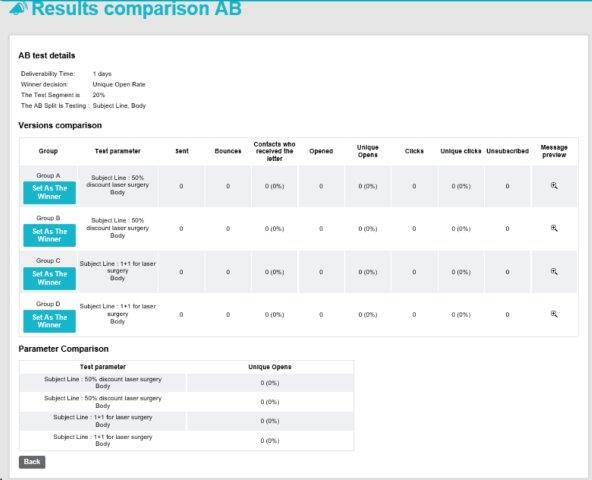
On that page, you can see the statistics of each version that was sent.
In order to choose the winning version, click on “Set as the Winner”.
Now the system will send the winning version to the rest of the contacts, in our case 80%.
After determining the winner, the system will send the campaign to the rest of the contacts who were not in the test campaign.
Upon examining the behavior of your recipients, you can divide them into groups: those who opened the email, those who clicked, and those who did not open emails from you at all and accordingly send each of these groups a uniquely targeted SMS.
How to do it? – check our SMS sending guide